Viewing Live QuickBooks Data within your Browser
Running QODBC within your browser, whether it's an internal Intranet or on the World Wide Web, requires the Server Edition of QODBC. QuickBooks must be running with the company file opened on the system console. The QODBC Server Edition includes DCOM servers required to allow QODBC running as a system service to find the instance of QuickBooks running on the server console.
There isn't much required to view live QuickBooks Data within your Browser. You have two choices in setting up a Web Server. The first is using the QODBC DCOM Servers. The second is using the Remote Connector Option.
The DCOM Servers require QuickBooks to be running on the Server Console, not a Terminal Services session. They are more secure and require no extra overhead but are more rigid on how it is setup and it can be difficult to configure the security of the DCOM servers.
The Remote Connector option allows the window that is running QuickBooks to be anywhere that is accessible via TCP/IP. That means QuickBooks can be run in a Terminal Sessions window, on another computer on your LAN or anywhere on the WEB. If your data will be transmitted over the internet we recommend you upgrading the Remote Connector to the SSL secure version. The instructions on setting up the Remote Connector version are found in Using QODBC Remote.

QODBC Basic Setup For Using the DCOM Servers Method
You must turn on use of the DCOM servers. You do this by running the QODBC Setup Screen and selecting the "Server Edition" tab page. Check the checkbox for "Use DCOM Servers".
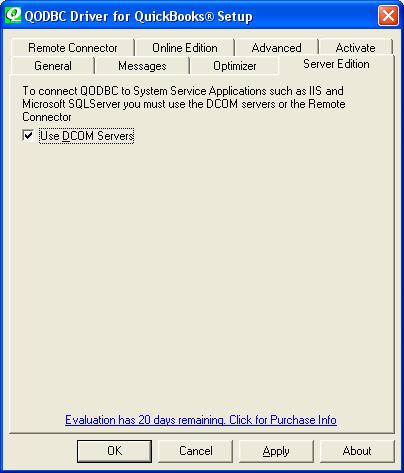
If you're working with the QuickBooks sample company file, this option is available to check even if you do not have a Server Edition license and will be ignored if you open a standard company file and do not have a QODBC Server Edition or evaluation.
Internet Information Server (IIS) Basic Setup
Ensure the following are installed and registered on your web server or even your notebook running Windows XP Pro :-
 |
Microsoft Internet Information Server (IIS5 or later) |
|
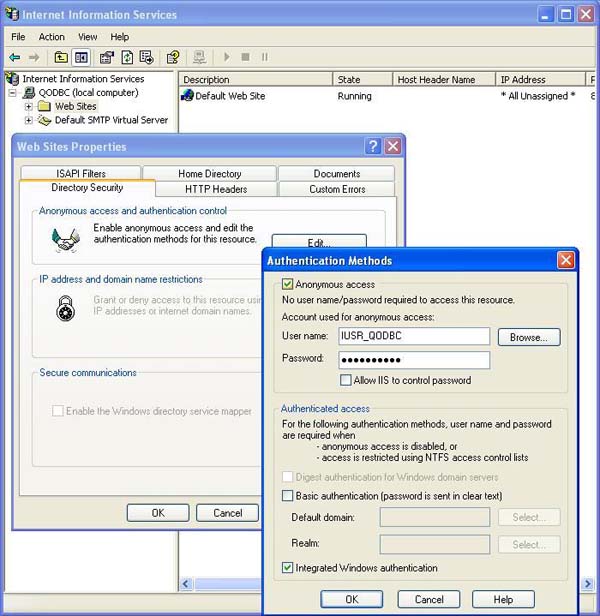
Uncheck the "Allow IIS to control password" setting for Anonymous access in IIS as shown here and set your own password. |
Automatic DCOM Configuration
Click here: qodbcSetDCOM.zip to download the following automated tools:-
|
Dcpinst.exe is an installation setup for the automated DCOM configuration object. This needs to be run first and only once. |
|
QODBCSetDCOM.VBS is a VB script that uses the installed configuration object to setup the DCOM Servers. It will reset and automatically add all necessary security each time it is run. The script can be edited if you need to change the Accounts it is configuring. |
|
The new settings will not take affect until the DCOM servers (qbXMLRPeQODBCInteractive.exe and qbXMLRP2eQODBCInteractive.exe) are removed from memory. Rebooting is the simplest way to accomplish this, but running the Windows Task Manager and Ending Process on any running copies will also work. |
|
Test your DCOM setup using one of the following:-
|
Setting up "Auto-Login" Unattended Mode
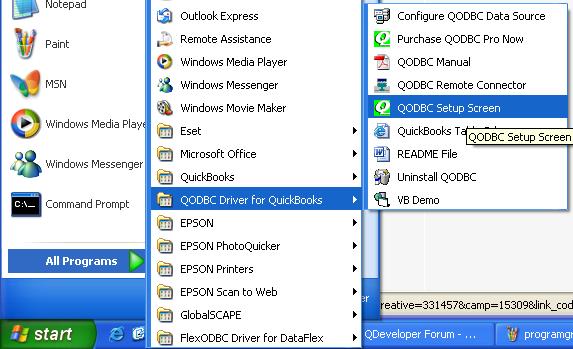
Locate the "QODBC Driver for QuickBooks" program group on your desktop. Click on the "QODBC Setup Screen" icon to launch the setup program supplied with QODBC.
The following general setup screen will become available. Check the Locate a company file: option. This allows you to setup the full path to where your QuickBooks data file resides. For example: “C:\Program Files\Intuit\QuickBooks Pro\Myapp.qbw”.
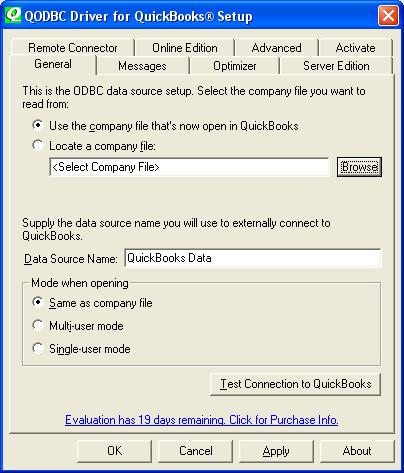
The [Browse] button will let you choose your QuickBooks company file from the folder it is in.

To use the QODBC auto-login unattended mode you must specifiy the full path of the QuickBooks company file you wish to connect to.

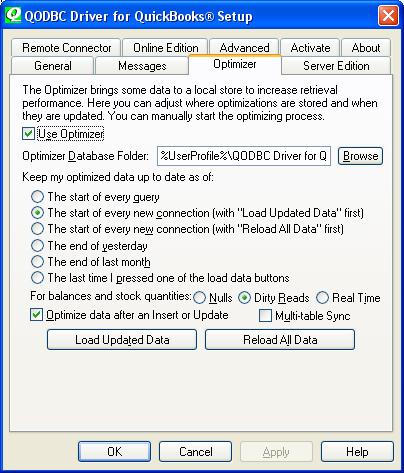
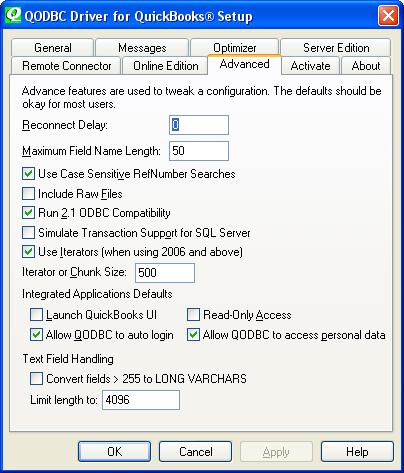
The Advanced tab in QODBC Setup v6 Build 148 and later now has new defaults for Integrated Application Defaults Authorization popup settings. These settings are only available to USA QuickBooks 2005 and USA QuickBooks 2006 users, otherwise they are greyed out. Use these settings to allow "auto-login" with or without a visible QuickBooks User Interface.
You will also have to authorize QODBC to login to QuickBooks automatically. To do this you must start QuickBooks as the Administrator. Go to the "Edit-Preferences" menu item in QuickBooks. Then select the "Integrated Applications" icon from the left side.
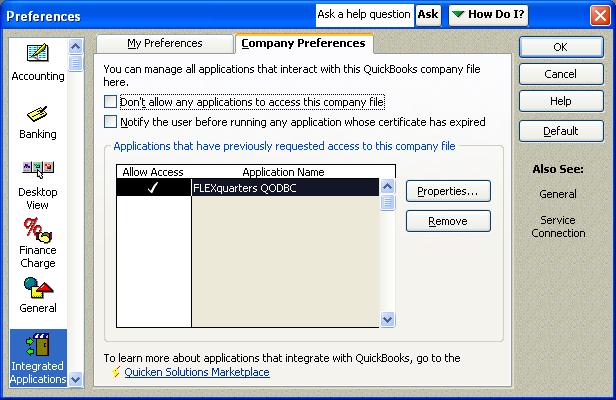
Then highlight one application (usually FLEXquarters QODBC) and press the "Properties" button and click on the Company tab. Check the "Allow this application to access this company file".
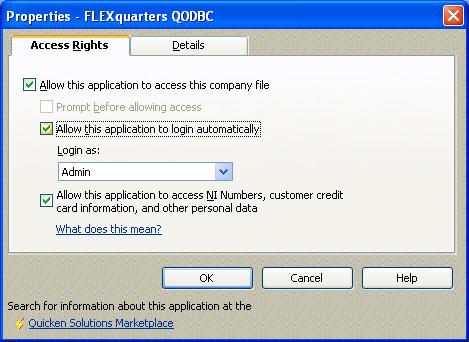
And check the "Allow this application to login automatically" and select a user from the "Login As" drop down. You will need to repeat this for all the applications on the list that you use.
Sample File: qbcust.asp
Now you're ready to try using QODBC within your browser, but first you will need a webpage to test! Download the following example by clicking here: qbcust.zip. Open the zip file and extract qbcust.asp. Save the file on your Local Disk in the \Inetpub\wwwroot folder as shown here:

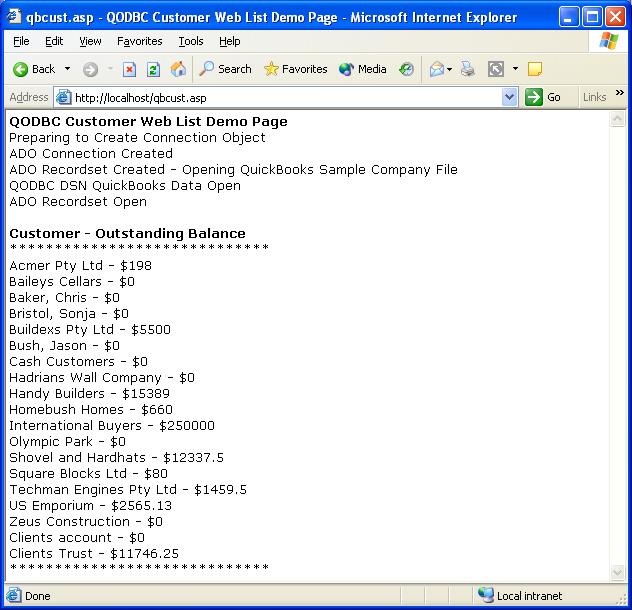
Launch your browser (making sure QuickBooks is currently running on your computer with your company file open) and run the example by entering the following URL in your browser :-
http://localhost/qbcust.asp
The following should be displayed on your browser (with your data) :-
Further examples of how to create invoices, purchase orders, payments, credits etc. can by found directly on our QODBC Sample SQL Scripts webpage.
QODBC also supports the printing of all the QuickBooks Reports through the ODBC Interface, see our webpage on Data Schema REPORT DETAILS for all the sp_reports (stored procedure reports) that may be accessed including information about the columns and the parameters for each report. Read more  |