If you have an application which stores sensitive company information, you may want the option to restrict which tables can be viewed by the users of the FlexODBC driver. FlexODBC includes a number of security options to allow you maximum flexibility and security. If you do not setup any security options, all files will be available to all system users.
All security changes are made via the ODBC command interface, so you can setup security in the included VBDEMO application, or in Microsoft Access SQL entry window. The following SQL commands will instruct the driver on how security should be setup on your computer network, and a file called FQDF.SEC will be created in the same folder as your FILELIST.CFG file for each DSN.
Note: Although the FlexODBC security file is set to “read only” mode by the driver, the possibility exists that users could delete the security file. You must ensure that the folder which is used for this file is set to not allow users to delete files, otherwise your security settings could be compromised.
To force users to login to the driver, use the “Login” option in the FlexODBC system setup screen.
There are two primary ways to setup the security rules used by FlexODBC: Grant all rights, and Revoke all rights. You need to decide which of these methods to start with, and it is usually based on how many tables you have that are critical to protect. If you have only a select few tables (such as a credit card table and a salary table), choose the Grant all rights method. If you want users to only have access to a few select files which are related to their job, choose the Revoke all rights method.
The term “users” can apply to a single person on your system, or it can apply to a class or group of employees. Any number of stations can use the same security rights you have assigned to a “user” of FlexODBC. Rights granted to the “Public” user are assigned to any user who does not login with a password to use the driver.

Command format
Add a user:
sp_adduser ‘username’ ‘password’
Modify a user:
sp_alteruser ‘username’ ‘newpassword’
Delete a user:
sp_dropuser ‘username’
Grant security rights to a user:
GRANT {ALL | rights list[,…n]} ON {ALL | tablename[,…n] | tablename(columnlist[,…n])[,…n]} TO {username[,…n] | Public}
Revoke security rights from a user:
REVOKE {ALL | rights list[,…n]} ON {ALL | tablename[,…n] | tablename(columnlist[,…n])[,…n]} FROM {username[,…n] | Public}
SQL command rights that can be granted or revoked:
ALTER TABLE
CREATE INDEX
DELETE
DROP
INSERT
SELECT
UPDATE
GRANT
REVOKE
SP_REINDEX
SP_ADDUSER
SP_ALTERUSER
SP_DROPUSER
Entering commands
Commands to change the security settings can be entered in the included VBDEMO application, or your SQL based application of choice.
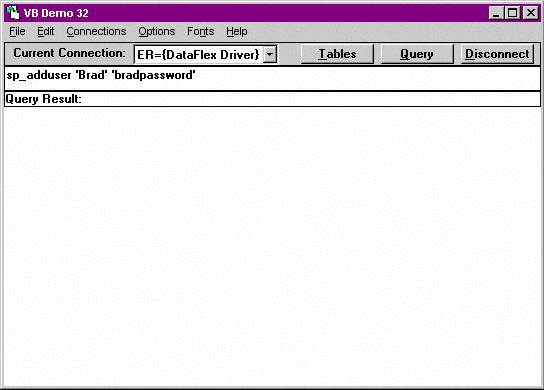
Enter the command in the SQL entry area and press enter. If the command was accepted, you should get a message similar to this:
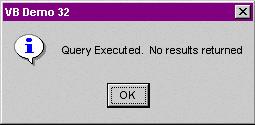
At this point, your security file has been created, and you can add additional commands. If you want to clear all security options and start over, delete the FQDF.SEC file. Security options become active the next time you load the driver.
Grant all rights
In this security option, you grant the ability to all system users to have access to all of the tables listed in your DataFlex Embedded DBMS system. After doing this, you can selectively revoke the rights to individual files that you want to protect.
Example Session
Give all system users rights to read all files: GRANT all ON all TO Public
Revoke rights to the EmpRecs table: REVOKE all ON EmpRecs FROM Public
Now, everyone can use all tables except the EmpRecs table. Additional secure files can be processed at this point.
Add a system user: sp_adduser ‘Linda’ ‘lindapassword’
Give the new system user all rights: GRANT all ON all TO Linda
Now all users have access to all tables except for the EmpRecs table, but if Linda logs in, he will have access to all of the tables available, because he has been granted rights that the public group does not have.
Revoke all rights
In this security option, you revoke the access rights to all of the tables listed in your DataFlex Embedded DBMS system. After doing this, you can selectively add rights to the individual files that you want users to have access to.
Example Session
Revoke all system users rights to use all files: REVOKE all ON all TO Public
Grant rights to the OrdEntry table: GRANT all ON OrdEntry TO Public
Now, the only table that everyone can use is OrdEntry. Additional public files can be processed at this point.
Add a system user: sp_adduser ‘Linda’ ‘lindapassword’
Give the new system user all rights: GRANT all ON all TO Linda
Now all users have access to the tables they have specifically been granted, but if Linda logs in, she will have access to all of the tables available, because he has been granted rights that the public group does not have.
Other Examples
Allow read-only access to all users:
REVOKE all ON all TO Public
GRANT select ON all TO Public
Delete a system user & associated rights:
sp_dropuser ‘Linda’
Grant multiple rights:
GRANT insert, delete, update ON all TO Brad |