QuickBooks qbXML SDK/Windows Vista Compatibility and QODBC
QODBC v7.00.00.214 (or higher) now works correctly with USA editions of QuickBooks 2007 R5 (or higher) and QuickBooks Enterprise Solutions 7.0 R5 (or higher) with the following caveats:
QODBC v9.00.00.253 (or higher) now also works correctly with all non-USA editions of QuickBooks 2008 (2008/09 or higher) and QuickBooks Enterprise Solutions 8.0 with the following caveats:
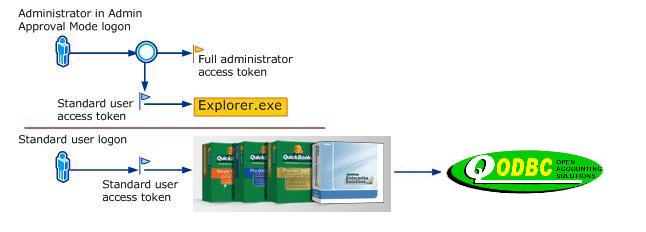
- The Vista user account must have its User Account Control (UAC) set to On (as recommended by Microsoft, see diagram below).
- Both QuickBooks and the QODBC application accessing the SDK should be run with standard user permissions (NOT elevated to run as administrator).
To perform the following instructions you must be logged into Vista using a Standard login account. When you first install QODBC it automatically activates a FREE "once off" 30 Day QODBC Server Edition Evaluation... so there's nothing to stop you from putting QODBC to work, doing what you need to do today! After 30 Days you will need to purchase a CD Key to activate and continue using the product. If you haven't already downloaded QODBC, do it now by clicking on the download button here :-

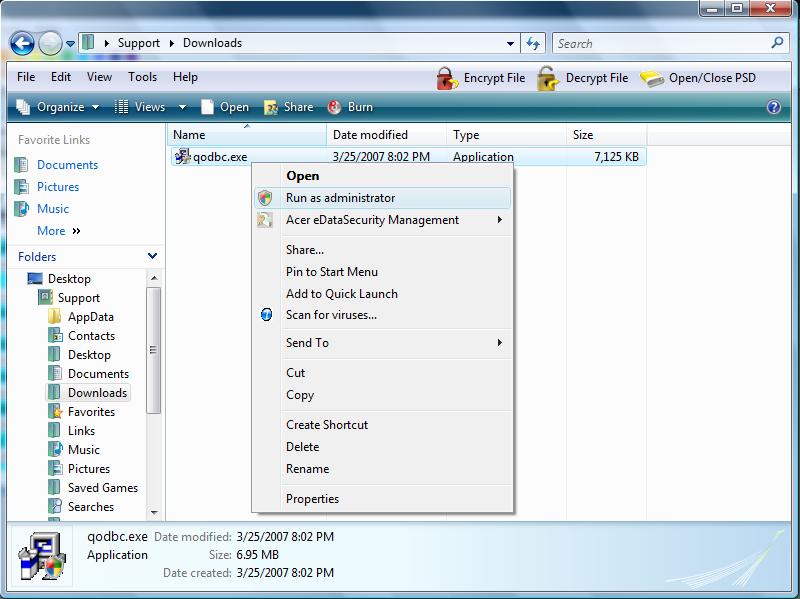
Locate the QODBC Installer
After you have downloaded QODBC, use Windows Explorer to locate the QODBC.exe download in your > Support > Downloads folder and right click on the file to install the driver in administrative mode.
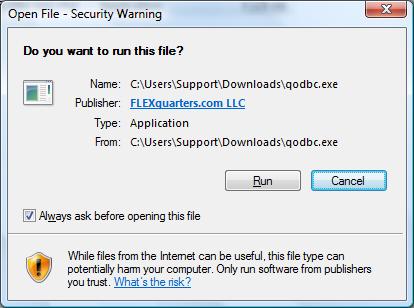
Click on the [ Run ] button to continue....
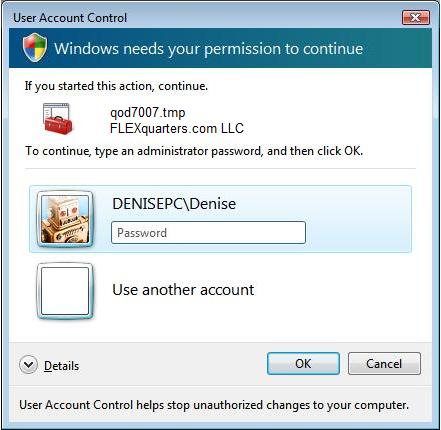
To continue, select a Vista administrator account, enter the admin password, and click on [ OK ] to continue.....
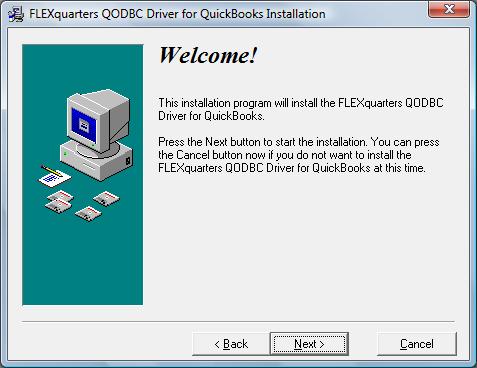
Click "Next>" to continue.
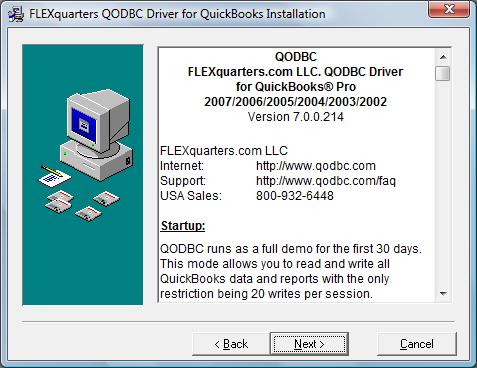
The product's readme file is displayed showing the revision and driver build you are about to install. Click "Next>" to continue.
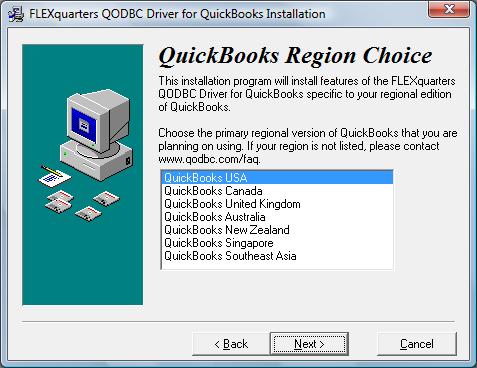
Follow the instructions on the screen and select the version of QuickBooks you are using from the supported list. All QuickBooks users in USA should select simply "QuickBooks USA". Click "Next>" to continue.
The QODBC Limited Use Software License is displayed. If you agree with the Limited Use Software License,click "Next>" to install QODBC, otherwise Cancel click to Cancel.

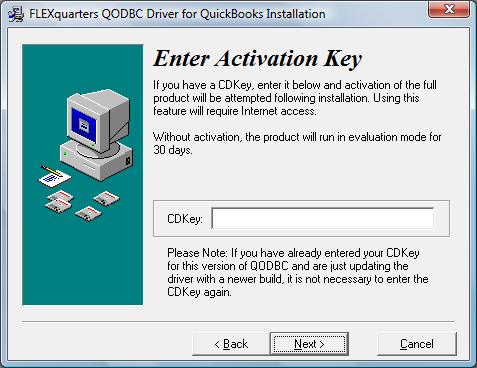
If you have already purchased a QODBC v7 (or higher) license, you would have your own CD Key. Enter the CD Key now, otherwise leave blank to operate QODBC in it's 30 Day Evaluation Mode. Click "Next>" to continue.
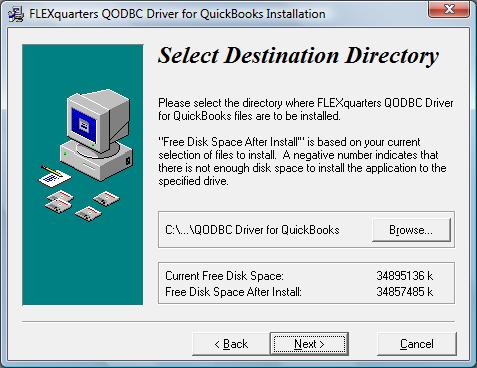
Select the Destination Directoy where to install QODBC. We recommend you accept the default directory on Drive C:. Click "Next>" to continue.
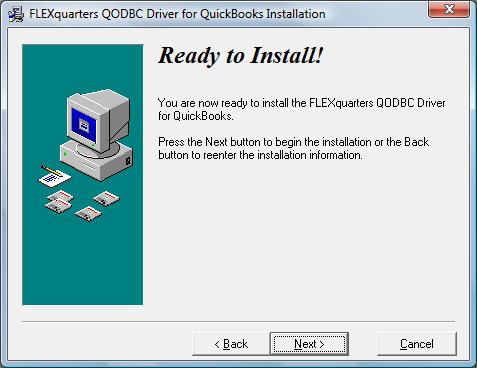
Click "Next>" to install QODBC or "Cancel" to abort the installation.
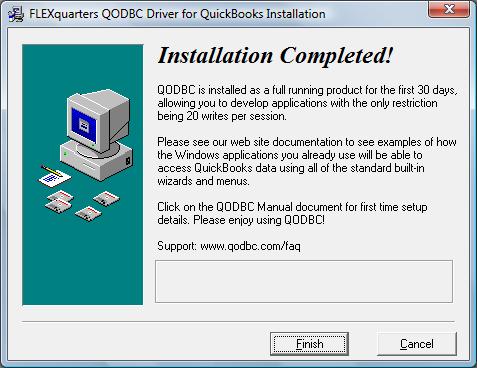
The QODBC product files are now installed. Click "Finish" to complete the installation.
If you receive the following:-
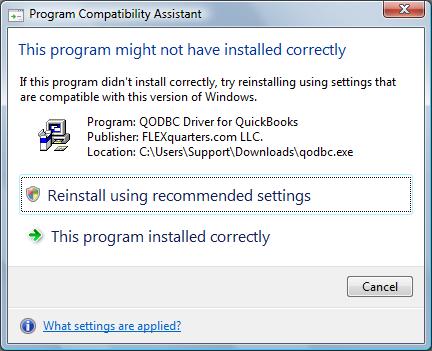
Just select "This program installed correctly" to finalize the installation.
Start QuickBooks before using QODBC
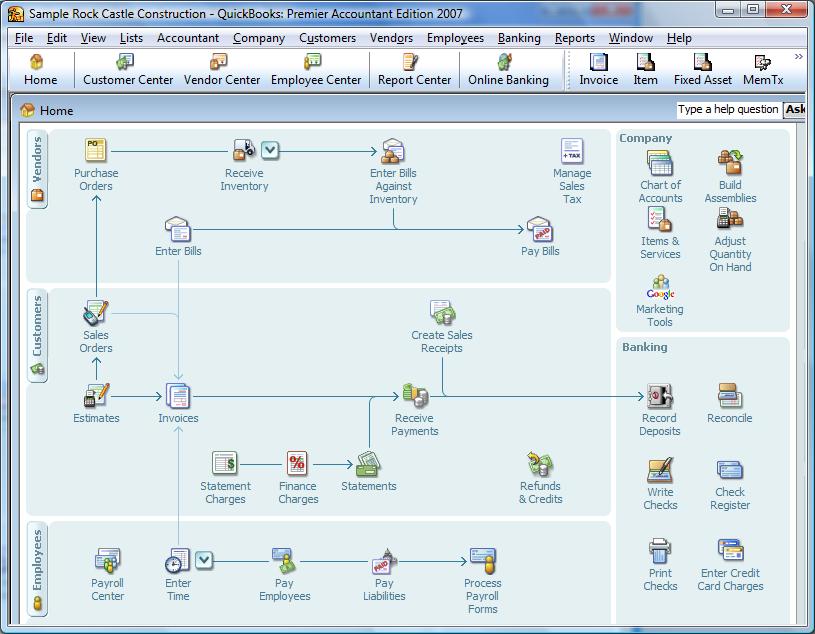
Once the FLEXquarters QODBC Driver for QuickBooks has been successfully installed onto your computer, you can begin to use it immediately using the FREE "once off" 30 Day QODBC Server Edition Evaluation mode. To start using QODBC, you first need to run QuickBooks on your computer logged in the QuickBooks Administrator (Admin) and open your company file, or one of the sample company files that came with QuickBooks, as shown here. This is for security reasons.
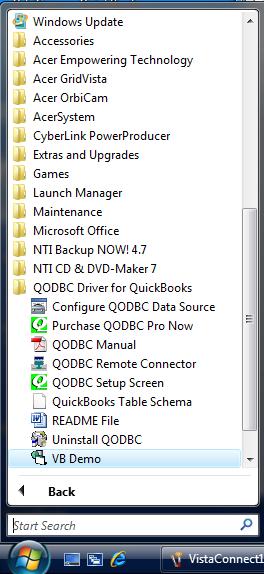
Running VB Demo
Leaving your QuickBooks company file open, click on "Start" and "All Programs" and locate the "QODBC Driver for QuickBooks" program group on your desktop. Click on the VB Demo shortcut to launch the Visual Basic Demo program supplied with QODBC.
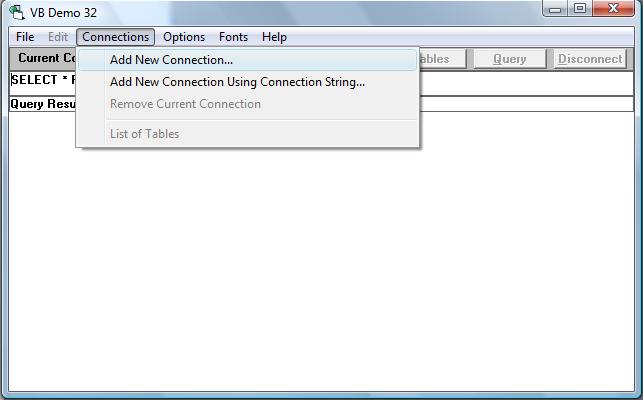
To establish a connection: From the menu bar select "Connections" / "Add a new connection".
Select the "Machine Data Source" tab and "QuickBooks Data" System DSN, Click "OK”. This will connect you to the current company file opened in QuickBooks.

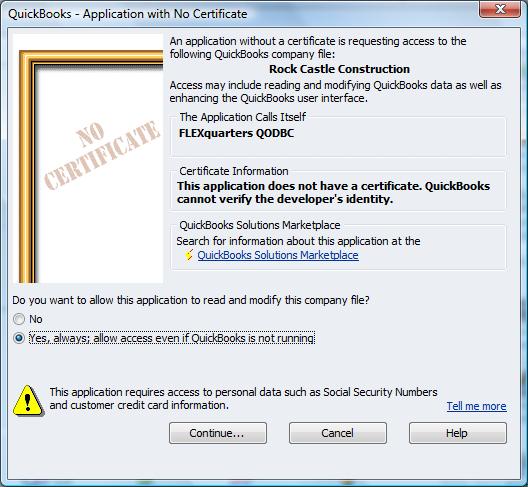
QuickBooks Integrated Applications with No Certificate
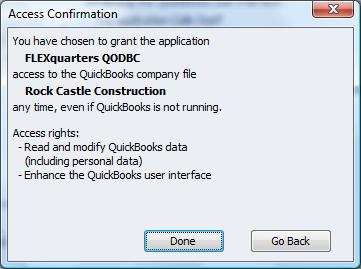
When QODBC starts and connects to a company file for the first time, QuickBooks will ask you permission for this driver to access your QuickBooks data. Check the "Yes, always; allow acess even if QuickBooks is not running" option and the QODBC driver will be added to the Integrated Application list in your company file. Click on [ Continue.... ] to continue.
Confirm that you want to allow this access by clicking on "Yes". This will allow applications to integrate with QuickBooks data when QuickBooks is running on the desktop.

QuickBooks will then confirm access, click on [ Done ] to continue.
Testing Your Connection
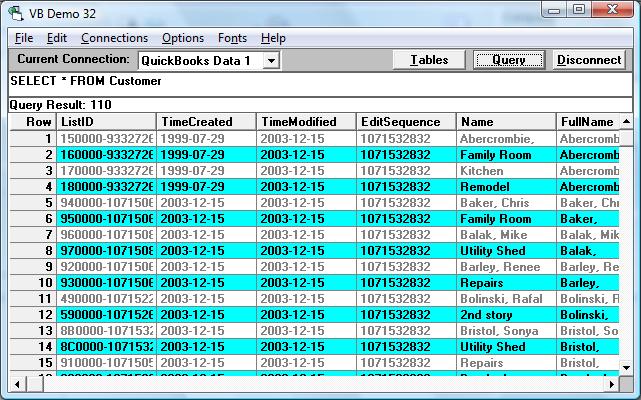
Now that you have successfully established a connection to your QuickBooks data, it's time to type in your desired SQL query, for example your can use the default "SELECT * FROM Customer" or type in another table like stock by entering "SELECT * FROM ItemInventory". Click on the "Query" button and the requested query results will appear! In case you're wondering, the * in the select statement means all columns in that Table.
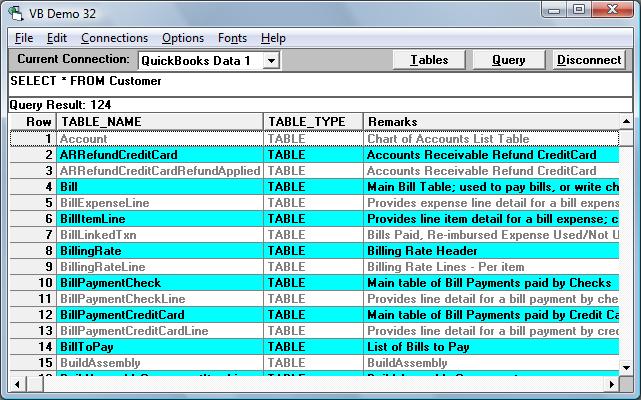
Alternatively, click on the "Tables" button to see a list of all the available QuickBooks tables. Double click on a table name to generate a query statement.
To disconnect, you can either select "Connections" / "Remove the connection" or Click the "Disconnect" button. |